Friday, May 15, 2009

I am so HAPPY to Announce..

I am so happy to announce that my tut are now being translated by an awesome lady named Jannie..
You can find her site HERE..
She also does translations for quite a few tut writers..
Big thank you to you Jannie..
Sue..xx

Tuesday, May 12, 2009

Pinup Girls..

Photobucket
Hope you like this tut..
You must have working knowledge of PSP..
Supplies:
PSP9 any version will work..
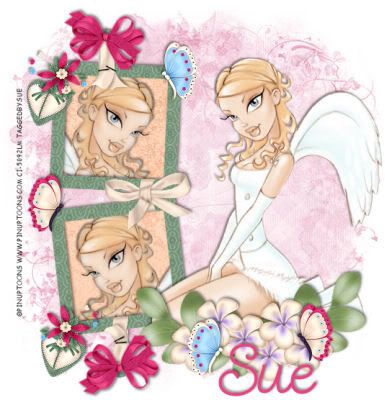
Tubes of Choice: I am using the awesome artwork of Pinup Toons..
You must have a license to use his artwork which you can purchase HERE..
Scrap Kit of Choice: I am using the awesome PTU kit "LilThisLilThat" by me..
Which you can purchase HERE or HERE..
Mask of Choice: I am using WSL_Mask84 HERE..
Thanks Chelle..
Font of Choice: I am using Saginaw..
Drop Shadow: 2 2 50 8
Filters:
Xero - Porcelain (optional)
Okay lets get started..
Open a new image 700x700 and flood fill white..We can crop later..
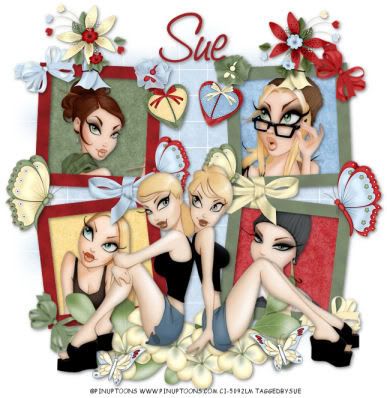
Paste DoubleFrame1 as a new layer and resize by 65%..Move to the left of your canvas..
Paste DoubleFrame2 as a new layer and resize by 65%..Place it on top of your frame1 and image - mirror..
Highlight Frame1 with your magic wand click inside one of the frames selections modify - expand by 5..
Paste a paper of choice..I am using Paper12..Selections invert - delete..Do not deselect..
Paste your tube as a new layer position it inside your marching ants hit delete..Add the Xero - Porcelain with the default settings..Then add a drop shadow..
Move your Frame1 above your paper and tube layer..
Now repeat this again with the other frame in Frame1 using a different paper and tube..I used Paper18..Remember to add the filter and a drop shadow to your tube..
Move your frame above your tube and paper layer add a drop shadow to your frame..
Highlight Frame2 and do the same with this frame as you did with Frame1 using different papers and tubes..I chose Papers 9 & 11..
Paste your main tube as a new layer position it between your frames..See my tag for reference..Add your Xero - Porcelain with default settings and a drop shadow..
Add any elements you wish..
Now to add your mask..Highlight your bottom layer paste a paper of choice..I am using Paper11..
Load mask - delete mask layer - merge group..I lower the opacity of my mask to 50% this is optional..
With a font of choice add your name with a drop shadow..
Add the correct copyright..
Crop excess white and resize..
Save as a png or a jpeg..
Then your done..
Thank you for trying my tut and feedback would be welcome..I would love to see what you have created..
Written by Sue May 12th 2009..
Any resemblance to another tut is coincidental..

Bright & Breezy..

Photobucket
Hope you like this tut..
You must have working knowledge of PSP..
Supplies:
PSP9 any version will work..
Tubes of Choice: I am using the fantistic artwork of Keith Garvey..
You must have a license to use his artwork which you can purchase HERE..
Scrap Kit of Choice: I am using the fantastic PTU kit "Bright & Breezy" by me..
Which you can purchase HERE or HERE..
Font of Choice: I am using Send Flowers..
Drop Shadow: 2 2 35 8
Okay lets get started..
Open a new image 600x600 and flood fill white..We can crop later..
Paste TripleFrame 1 as a new layer and resize by 80%..
With your magic wand click inside one of the frames..Selections modify - expand by 5..
Paste a paper of choice as a new layer..I chose Paper22..Selections invert - delete..Do not deselect..
Take one of your tubes and paste as a new layer..Position it inside the marching ants and hit delete..Selections none..Add a drop shadow to your tube..
Move your paper and tube layer under your frame layer..
Now do this with the other 2 layers choosing different papers and tubes..I chose Papers21 & 23..
Making sure your frame is the top layer add a drop shadow..
Hide your background layer and merge visible..Duplicate this image..On the original add Gaussian Blur 20..
Add any elements you wish..
With a font of choice add your name and a drop shadow..
Add the correct copyright..
Crop excess white and resize..
Save as a png or a jpeg..
Then your done..
Thank you for trying my tut any feedback would be welcome..I would love to see what you have created..
Written by Sue May 12th 2009..
Any resemblance to another tut is coincidental..

Sunday, April 26, 2009

Sweet Angel..

Photobucket
Hope you like this tut..
You must have working knowledge of PSP..
Supplies:
Tube of Choice: I am using the fantastic artwork of Pinup Toons..
You must have a license to use his artwork which you can purchase HERE..
Scrap Kit of Choice: I am using the awesome PTU kit "My Favorite Things" by me..
Which you can purchase HERE at WackyWinnie Designz..
Mask of Choice: I am using SabreL_BraveheartScrapkitMask1 HERE..
Thanks hun..
Font of Choice: I am using Send Flowers..
Drop Shadow: -2 2 50 5
Filters:
Xero - Porcelain (optional)
Okay lets get started..
Open a new image 600x600 flood fill white..We can crop later..
Paste DoubleFrame3 as a new layer and resize it by 70%..Move it to the left of your canvas..See my tag for reference..
With your magic wand click inside the top frame selections modify - expand by 5..Paste a paper of choice, I chose Paper 7..
Selections invert - delete, do not deselect..
Paste your tube as a new layer position the face inside the marching ants hit delete..Selections none..
Add the filter Xero - Porcelain with the default settings..Add a drop shadow..
Move your frame to the top layer..
Now do the same with the bottom frame..But with the tube I chose to mirror this is optional..
Move the frame to the top layer and add a drop shadow..
Paste your tube as a new layer I chose to have mine facing the frame it is your choice..Add a drop shadow..
Paste FlowerSprayBunch1 as a new layer resize by 70%..Position it so it looks like your tube is sitting on it..Add a drop shadow..
Add any elements you wish..
Now to add your mask..Highlight your bottom layer paste a paper of choice as a new layer..I chose Paper23..Load mask - delete mask layer - merge group..
With a font of choice add your name with a drop shadow..
Add the correct copyright..
Crop excess white and resize..
Save as a png or a jpeg..
Then your done..
Thank you for trying my tut any feedback would be welcome..I would love to see what you have created..
Written by Sue April 26th 2009..
Any resemblance to another tut is coincidental..

My Favorite Things..

Photobucket
Hope you like this tut..
You must have working knowledge of PSP..
Supplies:
PSP9 any version will work..
Tubes of Choice: I am using the gorgeous artwork of Jennifer Janesko..
You must have a license to use her artwork which you can purchase HERE..
Scrap Kit of Choice: I am using the awesome PTU kit "My Favorite Things" by me..
Which you can purchase HERE at WackyWinnie Designz..
Mask Of Choice: The one I am using I have supplied HERE..If this is yours please let me know so I may give you credit or take it down..
Font of Choice: I am using Saginaw..
Drop Shadow: 2 -2 50 5
Okay lets get started..
Open up a new image 600x600 flood fill white..We can crop later..
Paste DoubleFrame6 as a new layer..Resize by 60%..
With your magic wand click inside one of the frames selection modify - expand by 5..
Paste a paper of choice..I am using Paper22..
Selections invert - delete..Do not deselect..
Paste your tube as a new layer resize if you need..Place it inside the marching ants hit delete..Selections none..
Move the frame to the top layer..
Now do this again for the other frame..Once the frame layer is on top add a drop shadow to your frame..
Add any elements you wish..
Now to add your mask..Highlight your bottom layer..With a paper of choice I am using Paper8..Paste as a new layer..Load mask - delete mask layer - merge group..
I resized my mask layer by 80% twice..
With a font of choice add your name with a drop shadow..
Add the correct copyright..
Crop excess white and resize..
Save as a png or a jpeg..
Then your done..
Thank you for trying my tut any feedback would be welcome..I would love to see what you have created..
Written by Sue April 26th 2009..
Any resemblance to another tut is coincidental..