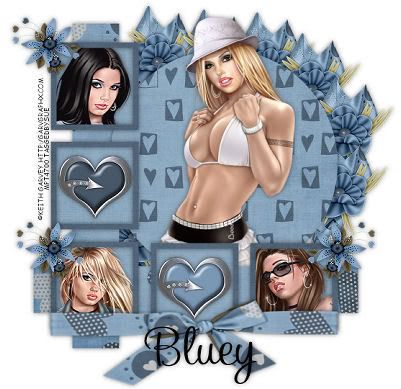
Hope you like this tut..
You must have a working knowledge of PSP..
Supplies..
Psp9 but any version will work..
3-6 Tubes of Choice: I chose the fabulous artwork of Keith Garvey..
You must have a license to use his work which you can purchase HERE..
Scrap Kit of Choice: I am using the gorgeous FTU kit "You Make My Heart Blue"
By Blue Dream Designs HERE..
Thank you hun..
Template #20 by Yvette HERE..
Thanks hun..
Font of Choice: I am using Sweetheart Script..
Drop Shadow: 0 0 50 10
Okay lets get started..
Open the template shift D and delete the original..Also delete the copyright layer..
Go to image - canvas size and increase to 600x600..
Highlight thin rectangle 2 select all - float - defloat..With a paper of choice paste as a new layer..Selections invert then delete..Add a drop shadow then delete the original layer..
Now do the same with the other layers choosing different papers except for the frames..
Remembering to delete the original layer and add a drop shadow..
Now on the frame layer..Select all - float - defloat add a paper of choice..
Selections invert then delete..Delete the original layer but do not add a drop shadow yet..
Making sure you are on your frame layer select your magic wand click inside one of the frames..Selection modify expand by 3..
Select a tube and paste as a new layer..Position it so that the part of the tube you want in the frame is showing..Selections invert then delete..Add a drop shadow..Move this layer below your frame layer..
Now it is your choice you can fill each of the frames with tubes or do as I have and alternate with elements..
Always remember to add your drop shadow and move them below your frame layer..
Once you have finished your frames add a drop shadow to the frame..
Now take your main tube and paste it on top of the circle..Using your eraser tool erase any parts you don't want showing..Add a drop shadow..
Now add any elements you wish..See my tag fro reference..
Add your name with font of choice..
Add the correct copyright..
Crop any excess white and then resize if you need to..
Save as a jpeg or png..
Then your done..
Thank you for trying my tut any feedback would be welcome..
Written by Sue february 13th 2009
Any resemblance to another tut is coincidental..


No comments:
Post a Comment